
How to Prepare Your Yard for Fence Installation (Checklist for Homeowners)
March 9, 2026
- By
- Star Gate & Fence
- Fence and Gate Installation Specialists
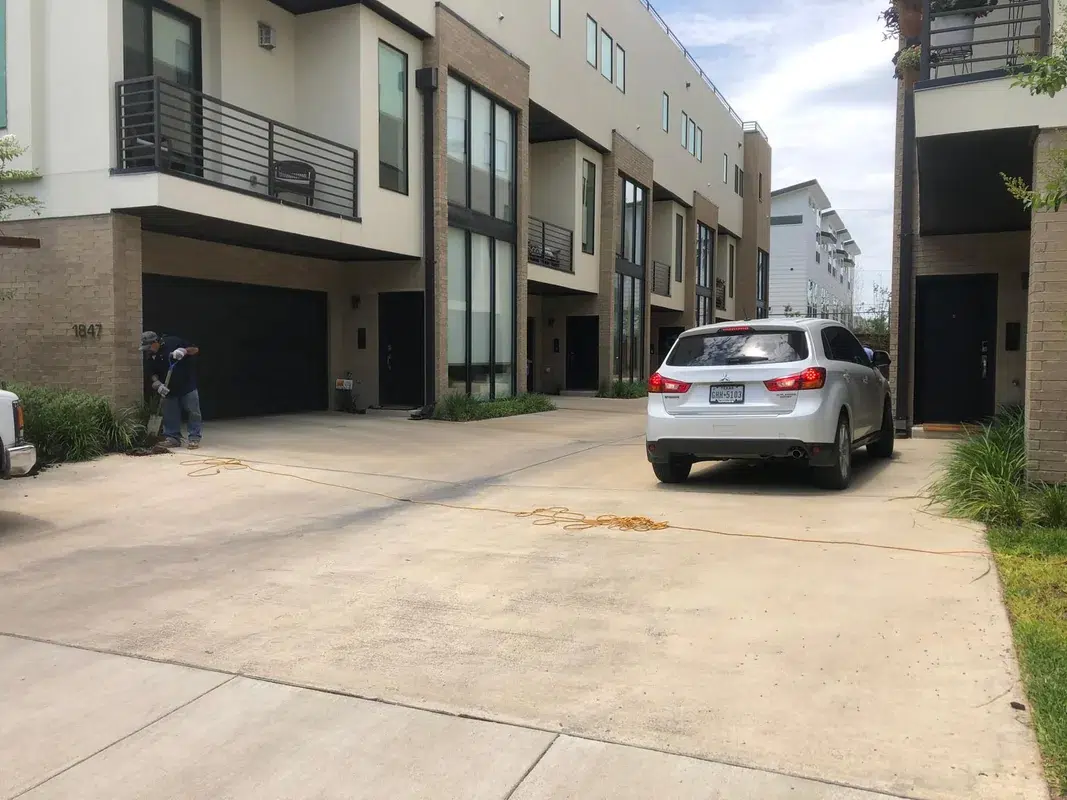
At Star Gate & Fence, we’ve helped homeowners with fence and gate projects for years of experience, and we can promise this: the smoother the prep, the smoother the installation. This checklist is for homeowners who want fewer delays, fewer change orders, and a fence that lasts. We’ve seen projects move ahead days faster simply because the yard was properly cleared and marked before our crew arrived. If you’re working with a professional fence company, preparation directly affects cost, timeline, and final quality. We’ve also seen the opposite. One homeowner skipped utility marking and hit a shallow irrigation line during post-hole digging. The repair added unexpected plumbing costs and pushed the project back a week. Preparing your yard for fence installation isn’t busywork – it protects your property, your budget, and your safety.
What Professional-Grade Fence Prep Should Include
The most important best practices focus on structure, drainage, and code compliance. A fence is only as strong as its posts and the soil around them. Poor preparation leads to leaning sections, premature rot, and gate misalignment. Professional-grade preparation should include:
- Proper post depth – Posts typically extend 24 – 36 inches below grade, or deeper in frost-prone areas. Depth should follow local building codes and frost-line requirements.
- Concrete footing standards – We use high-strength concrete mixes (often 3,000 – 4,000 PSI) and bell-shaped footings in loose soil to prevent uplift.
- Drainage planning – Soil sloping toward posts can trap water. Grading adjustments or gravel backfill may be required to reduce moisture retention.
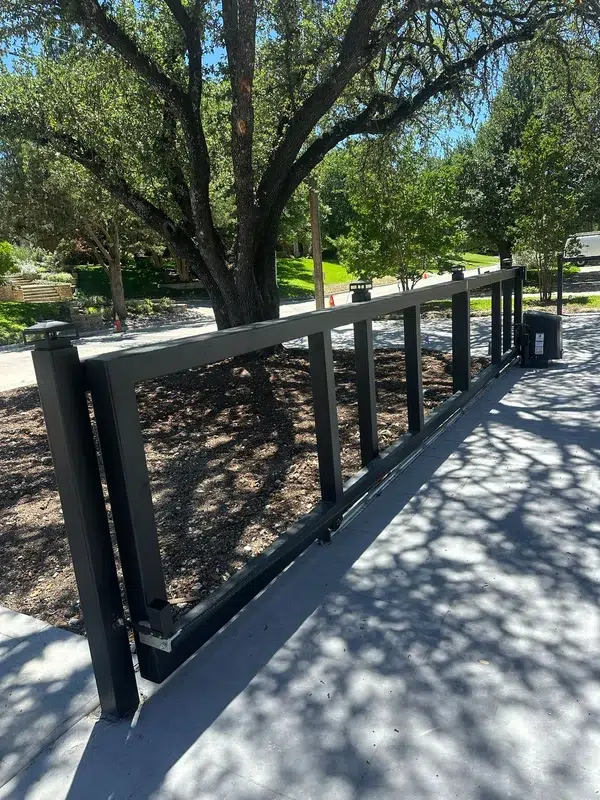
- Gate reinforcement – Gate openings require heavier posts, often 4×4 or 6×6 pressure-treated lumber or steel posts, depending on span and weight.
- Code awareness – Many municipalities reference International Residential Code (IRC) provisions for structural and safety considerations, especially around pool fencing height and self-closing gates.
How to Avoid Delays and Cost Surprises
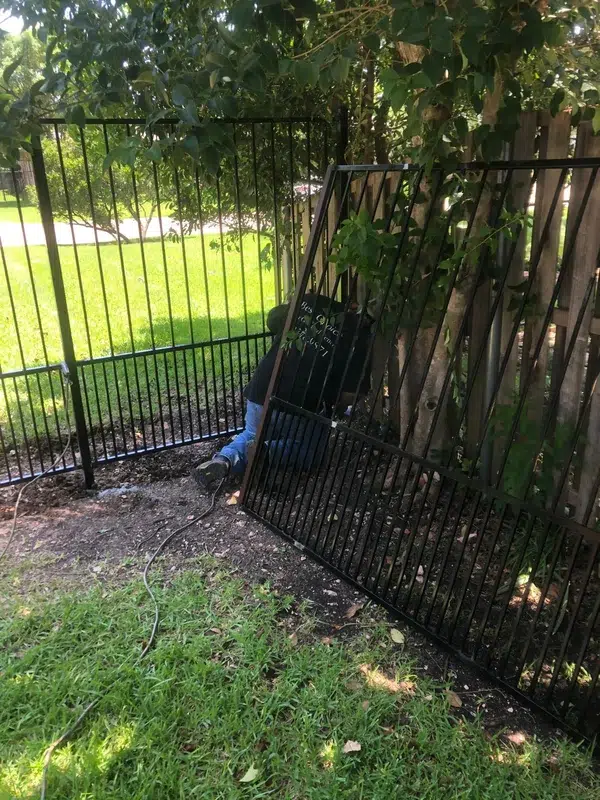
Most delays in fence installation trace back to site conditions that weren’t addressed before crews arrived. When preparing your yard for fence installation, small oversights can translate into measurable cost increases. A homeowner once removed an old fence but left concrete footings buried underground. Our auger struck multiple hidden footers, forcing manual demolition with a jackhammer. That added labor time and disposal fees. DO:
- Remove old concrete footings – WHY: Hidden footers block new post placement. HOW: Excavate and break up with a sledgehammer or demolition hammer before installation day.
- Communicate HOA requirements – WHY: Height, style, or material restrictions can require changes. HOW: Provide written guidelines to your contractor in advance.
- Budget for contingencies – WHY: Rocky soil or root systems can require specialty tools. HOW: Expect site prep adjustments in challenging terrain.
- Assume flat ground means easy installation – Uneven subsurface conditions can still require stepped panels or custom cuts.
- Ignore cure times – Hanging panels before concrete sets can shift posts out of plumb.
- Block access with vehicles or materials – Limited access slows progress and increases labor time.
Schedule a Professional Fence Site Evaluation
If you want your project to move forward without delays, start with a professional site evaluation. We assess grading, soil conditions, access points, and underground risks before installation begins. That upfront planning protects your investment and prevents costly mid-project changes. Our team walks the property with you, reviews layout options, and explains post depth, materials, and structural considerations in clear terms. Whether you’re planning a privacy fence, decorative perimeter, or security upgrade, we’ll outline the preparation steps that make the difference between a fence that lasts five years and one that lasts decades. Let’s make preparing your yard for fence installation straightforward and stress-free. Book your evaluation and get clear answers before the first hole is dug.
FAQs
How far in advance should I start preparing my yard for fence installation?
We recommend starting at least two to three weeks before your scheduled installation date. The first step – calling 811 for underground utility marking – typically requires a few business days’ notice, and markings are only valid for a limited time. If you need a property survey, scheduling a licensed surveyor can also take time depending on demand. Beyond utilities and boundaries, homeowners often underestimate how long clearing takes. Removing brush, relocating garden beds, trimming tree limbs, and exposing irrigation lines can take several weekends if done carefully. If you’re removing an old fence, concrete footings may require additional labor with a demolition hammer. Starting early allows time to address surprises such as buried debris, grading corrections, or HOA approvals. Rushed preparation increases the risk of installation delays, added labor charges, or damage to landscaping that could have been protected with better planning.
Do I need a permit before installing a new fence?
Permit requirements vary by municipality, but many areas require permits for new fences over a certain height, commonly six feet. Pool fences almost always require permits and must meet safety provisions such as self-closing, self-latching gates and minimum height standards often tied to International Residential Code guidelines. We advise contacting your local building department before installation. Some jurisdictions also regulate setback distances from sidewalks, easements, or utility corridors. Installing within an easement can lead to mandatory removal if utility companies need access. HOA approval is separate from municipal permits and may dictate material type, color, or style. Failing to secure approvals can result in fines or forced modifications. Confirming these requirements during the preparation phase avoids stop-work orders and prevents you from investing in materials that may not meet local code or community standards.
How much does fence installation typically cost and how long does it take?
Fence installation costs typically range from 25 to 60 dollars per linear foot for many residential projects, though the final price depends heavily on the material selected and the overall design. Decorative metal, composite systems, and specialty security fencing often exceed this range due to higher material costs and more complex installation requirements. Most standard backyard fence installations are completed within one to three days once the site has been properly prepared and utilities have been marked. Several key factors influence total project pricing. Site complexity plays a major role, especially in areas with rocky or clay heavy soil, uneven terrain, slopes, or extensive root systems that require additional excavation. Material selection also affects cost, including differences between wood, vinyl, aluminum, steel, and the necessary hardware components. Total project scope is another consideration, including linear footage, number of gates, custom layouts, and height requirements. Additional features such as automated entry gates, reinforced posts, upgraded hardware, or removal of existing fencing and concrete footings can increase both labor time and overall expense. These figures serve as general benchmarks for planning purposes and do not represent a binding estimate. A detailed on site evaluation is required to provide an accurate and finalized proposal tailored to your property.
Can I prepare my yard myself, or should I hire a professional?
Homeowners can often handle basic preparation tasks such as clearing debris, trimming vegetation, and marking sprinkler heads. Calling 811 for utility locates is also a straightforward and essential step you can initiate yourself. However, certain preparation tasks benefit from professional oversight. Verifying property lines may require a licensed surveyor. Evaluating soil stability, slope transitions, and drainage patterns often requires experience. We’ve seen situations where homeowners cut major tree roots to clear the fence line, only to create long-term tree stability issues. If your project involves heavy gates, steel posts, or automated systems, preparation should align with structural load requirements and manufacturer specifications. In those cases, professional coordination prevents misalignment and premature hardware failure. A balanced approach works best: handle simple clearing tasks yourself, and consult professionals for structural, boundary, or code-related questions.
What should I look for in my yard that could cause installation problems?
Begin with a thorough inspection of both visible and concealed obstacles along the proposed fence line. Large surface rocks, buried construction debris, remnants of old concrete footings, and dense root systems frequently interfere with proper post placement. These obstructions can deflect augers, reduce achievable post depth, and compromise structural stability. Pay close attention to grading conditions as well. Uneven terrain, erosion channels, or low areas where water naturally collects may require regrading or drainage improvements before installation. Persistent moisture can weaken soil bearing capacity and accelerate deterioration of certain post materials. Irrigation components require special attention. Sprinkler lines are often installed just a few inches below the surface and are highly susceptible to damage during digging. Clearly mark sprinkler heads with flags and identify valve boxes to better estimate pipe routes. If available, consult irrigation plans to minimize accidental disruption. After rainfall, observe how water flows across the site and note any pooling near the intended fence alignment. Finally, evaluate overhead conditions such as tree branches, utility lines, or roof overhangs that could restrict gate movement. Identifying these factors early allows for informed adjustments to layout, depth, and material selection, reducing the risk of costly structural problems later.
What are the most common mistakes homeowners make before installation day?
One of the most common mistakes homeowners make is assuming the installer will handle every aspect of preparation without a clear conversation beforehand. While contractors are responsible for the structural installation of the fence, tasks such as major clearing, hauling away debris, trimming overgrown vegetation, or relocating landscaping features are not always included unless clearly outlined in the agreement. Another frequent oversight is neglecting to confirm exact property boundaries. Installing a fence even a few inches onto a neighbor’s property can lead to disputes, costly adjustments, and in some cases legal action. Homeowners also tend to overlook access planning. Narrow entry points, locked gates, pets in the yard, or vehicles blocking driveways can slow down crews and extend labor time. We have also seen cases where decorative borders, garden beds, or small concrete pads were added along the fence line shortly before installation, creating avoidable obstacles. Proactive communication, proper site preparation, and a thorough walkthrough with the contractor before installation day help prevent delays, unexpected costs, and unnecessary frustration.
What should I look for when hiring a fence contractor?
Look for contractors who take the time to explain technical details in clear, straightforward language. A knowledgeable professional should be comfortable discussing post depth, concrete PSI ratings, frost line considerations, and the specific methods they use to handle slopes or drainage challenges. When answers are vague or overly simplified, it can indicate limited hands on experience. Always confirm that the contractor holds proper licensing if required in your area, and verify active insurance coverage. General liability insurance protects you in the event of accidental property damage during installation, while workers compensation coverage safeguards both you and the crew if an injury occurs on site. Request a detailed written proposal that outlines materials, total linear footage, gate specifications, hardware quality, and cleanup responsibilities. The estimate should also address anticipated timelines, recommended cure times for concrete, and any follow up inspections if needed. Reputable contractors are transparent about potential cost adjustments related to soil conditions, limited equipment access, underground utilities, or hidden obstructions. Clear, proactive communication before installation is often the strongest indicator that a contractor prioritizes structural integrity, durability, and long term performance.
What should I do if I discover a problem in my yard right before installation?
If you discover buried debris, standing water, damaged irrigation lines, unclear property boundaries, or any other unexpected condition just before installation, pause the project and notify your contractor immediately. Moving forward without resolving these concerns can lead to structural instability, drainage problems, or unnecessary repair expenses later. For irrigation damage, shut off the water supply right away to prevent flooding, soil erosion, or water intrusion into nearby foundations. If utility markings are missing, faded, or difficult to identify, contact 811 to request updated markings before any digging resumes. This step helps prevent dangerous and costly utility strikes. When unexpected concrete slabs, large rocks, tree roots, or old construction materials are uncovered, discuss with your contractor whether removal should take place prior to installation or as part of the installation process. Addressing obstacles in advance can minimize equipment downtime and scheduling delays. In many cases, these issues are manageable with a short reassessment and minor plan adjustments. Prompt communication, proper documentation, and a coordinated response help keep the project on schedule while protecting structural integrity, safety, and long term performance.